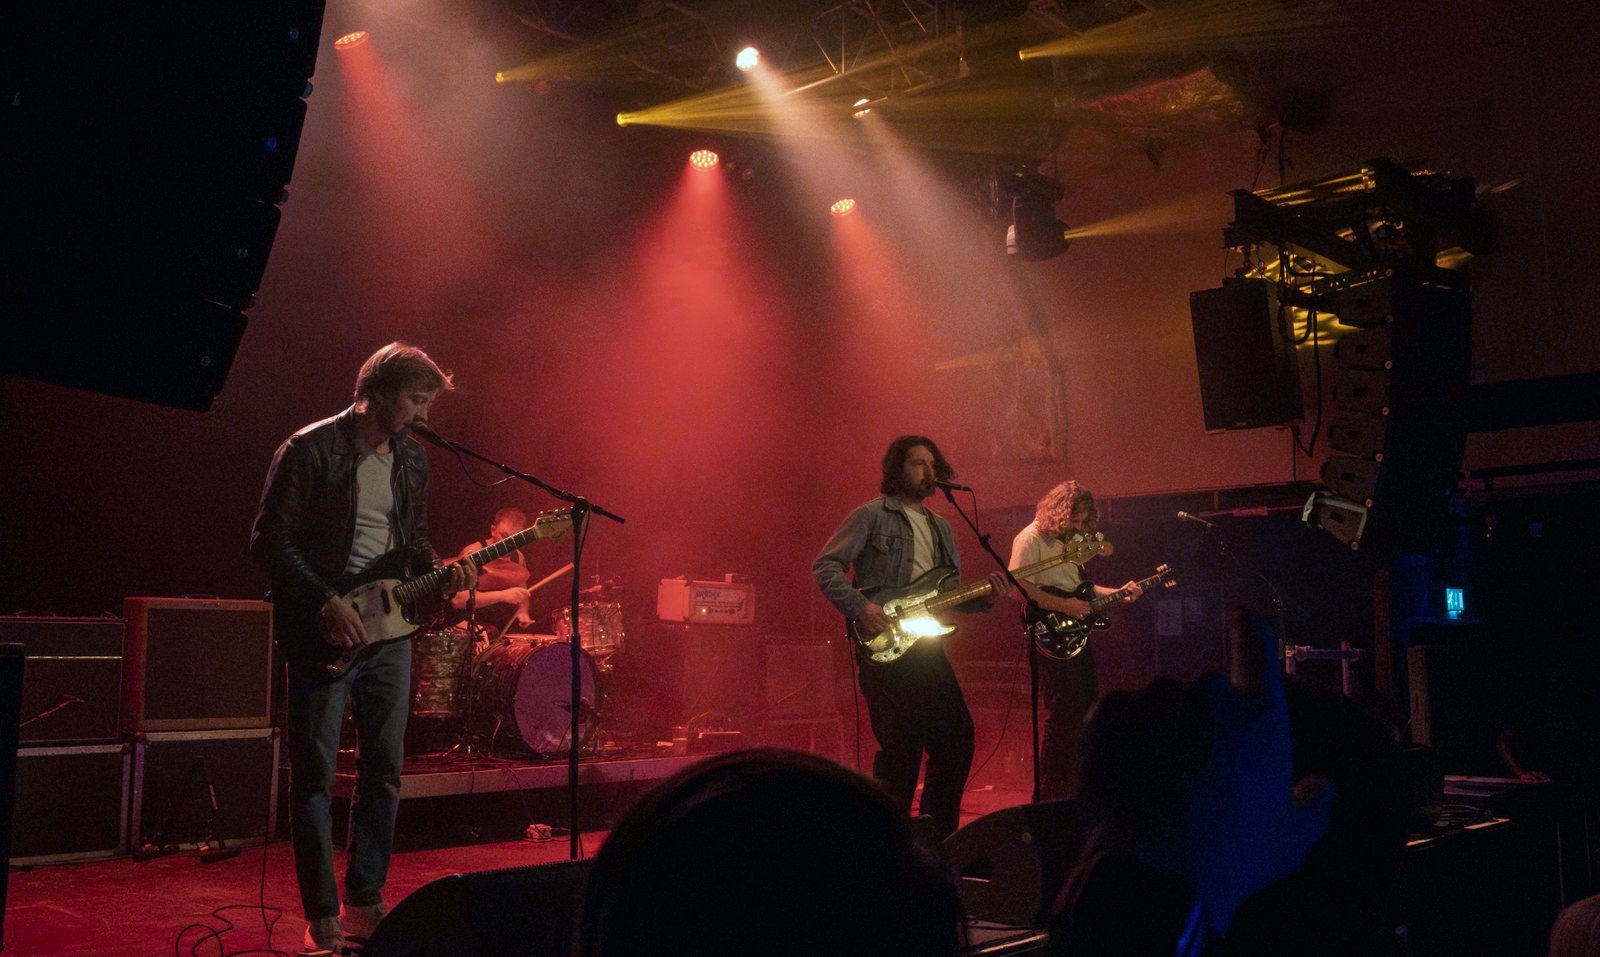
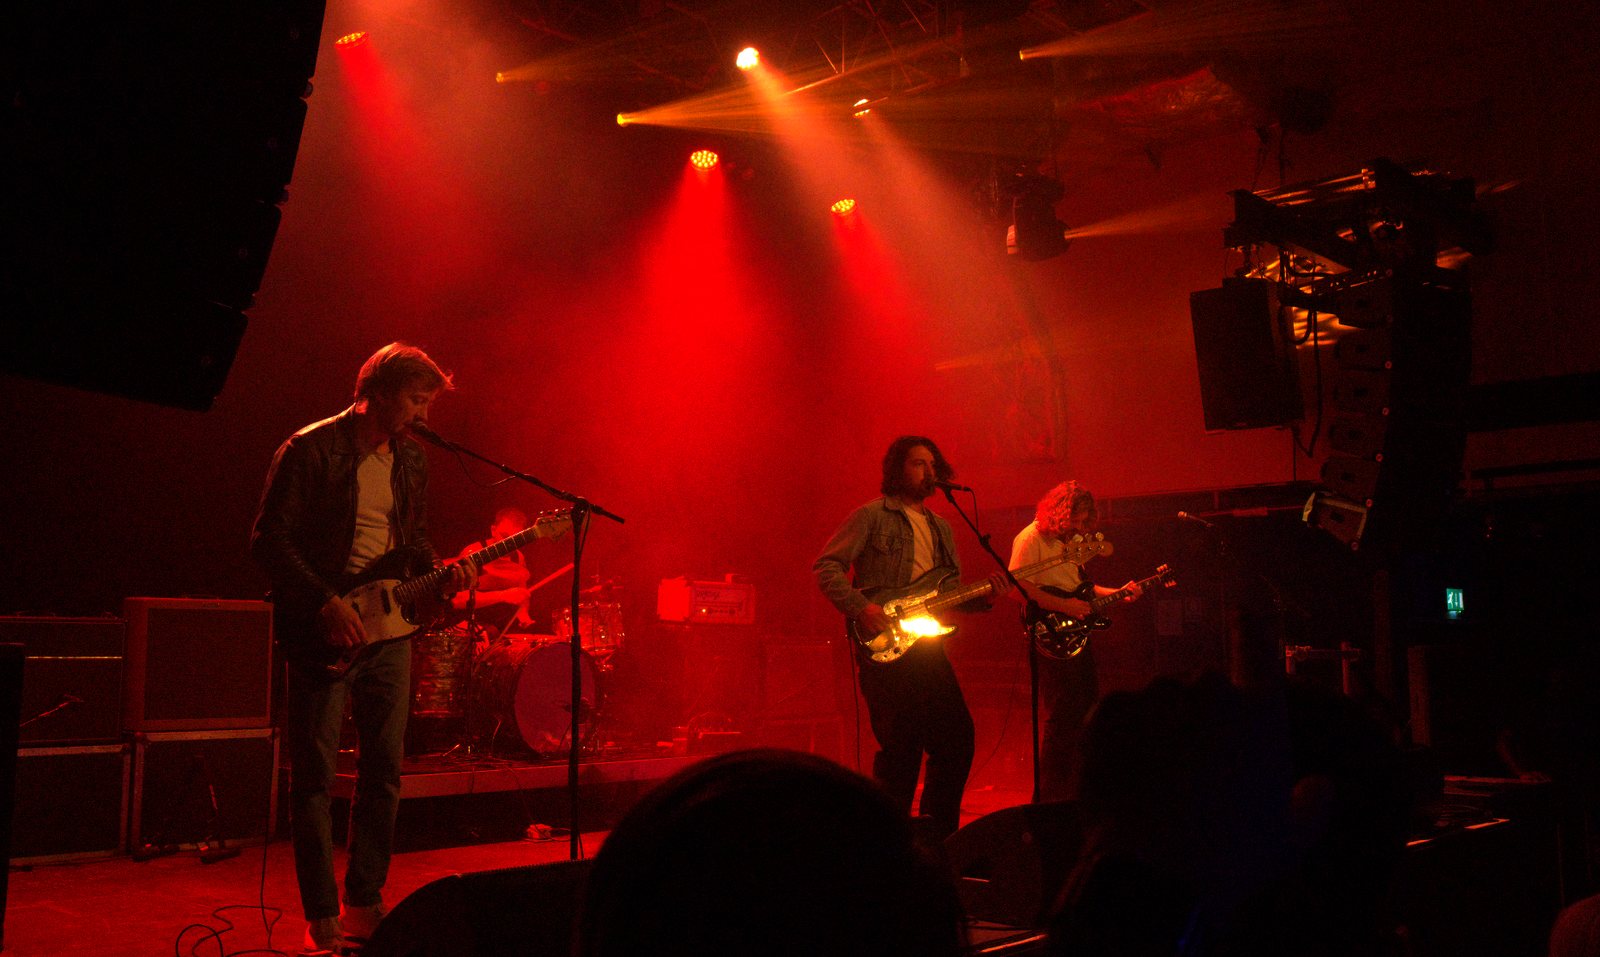
Red stage light is the one that ruins gig photos. The band are lit, the room looks great in person, and then every frame comes home as a single shade of red. Faces go flat, white shirts turn pink, and there is no detail left to work with.
The usual fix is to pull the red saturation down. That calms things, but it drains everything else with it, and you end up with a muddy, near-monochrome picture. I wanted the opposite: take the red light out and get the real colours back.
Why it works at all
Stage LEDs are close to a single pure colour, so the camera records very little in the green and blue channels. Very little is not nothing, though. Shoot RAW and that faint green and blue information is still in the file, and it holds the real colour of everything on stage: the denim, the guitar finishes, the amps, the skin.
The trick is to set white balance to the colour of the light itself rather than to what looks normal. For red light that means far cooler and greener than feels right. Lightroom's Temperature slider stops at 2,000K, which on my shots wasn't quite far enough, so a gentle red and blue channel curve finishes the job. Vibrance then brings the saturation back once the cast is gone.
The recipe
If you'd rather do it by hand, this is the red preset in full:
Tone curve: red channel top point 255 → 243, blue channel top point moved in to 248
Color mixer: Red hue +8, Red saturation −15, for skin
Presence: Vibrance +20
Light: Highlights −30, Shadows +30
The presets
I've turned this into eight free presets, for Lightroom Classic and Lightroom: three strengths for red light, three for magenta and pink, and two for mixed rigs. Download them here.
- Red Light 1 to 3: a red wash. Start with 2. Go to 3 for the deepest reds, but watch for faces tipping cool.
- Magenta Light 1 to 3: magenta and pink light. 2 clears the cast from faces and the crowd. The beam itself stays pink.
- Mixed Light 1 and 2: red or magenta front light with blue behind. A partial fix, more on that below.
How to use them
- Shoot RAW. This only works because of the extra information in the raw file. A JPEG has already thrown it away.
- Denoise first. At high ISO, the green and blue channels under red light are mostly noise. Running Denoise before the preset keeps skin clean.
- Apply a preset and pick the strength. The white balance is built in, so there's nothing to set beforehand. If a song's lighting is slightly different, nudge Temperature and Tint from there.
- Finish by eye. Exposure, Blacks and Contrast are left alone on purpose, because they depend on the room. I usually add a little contrast and a touch of Blacks, but not so much that the shadows start to break up.
- Mask faces if they're still hot. Under the strongest light, a Select People mask with Temperature around −10 brings skin the rest of the way.
Where it falls down
A preset makes one correction for the whole frame. That's perfect when the stage is lit one colour, and much less useful when it isn't. With red on the band and blue behind, cancelling one makes the other worse. For those, apply a Mixed preset to get close, then use a subject mask to fix the band separately.
It also can't invent colour that was never recorded. Treat the presets as a strong starting point rather than a finished edit.